How to Correctly Replace a Shower Head
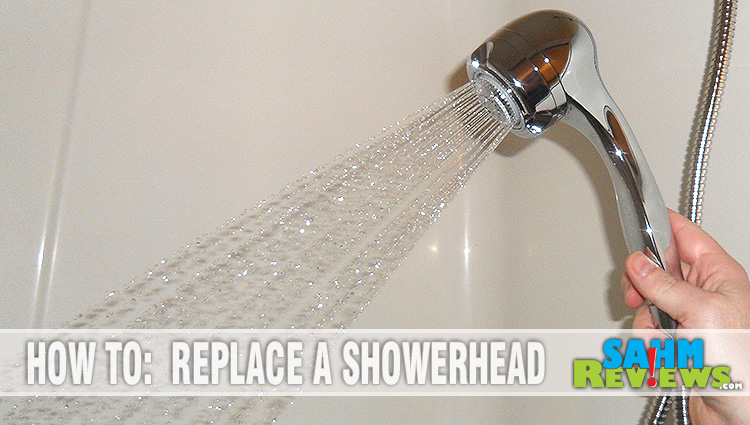
Take a look at your shower head. Go ahead, take a good look. I’ll wait. It is clean and free of buildup? Even if you answered “yes” to this question, is it clean on the inside? Do you enjoy the same amount of water pressure you did when you purchased it? I’ll wager probably not.
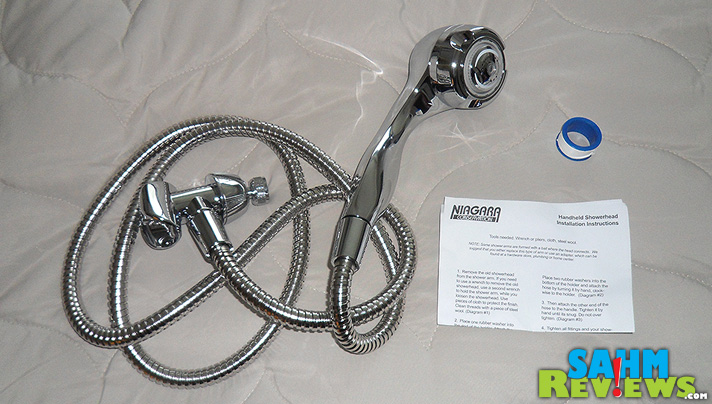
There are two schools of thought when it comes to shower heads. One is to buy an expensive, long-lasting one and clean it regularly. And by “clean it” I mean removing it, soaking it in some CLR and then re-installing it. On the other end are those that think like I do; why go through the trouble of all that cleaning when you can purchase a brand new one every few years for under $20? Either way you have to go through all of these steps regardless of which school you belong to. That’s my project today, and for it I selected the Niagara Earth Massage Handheld.
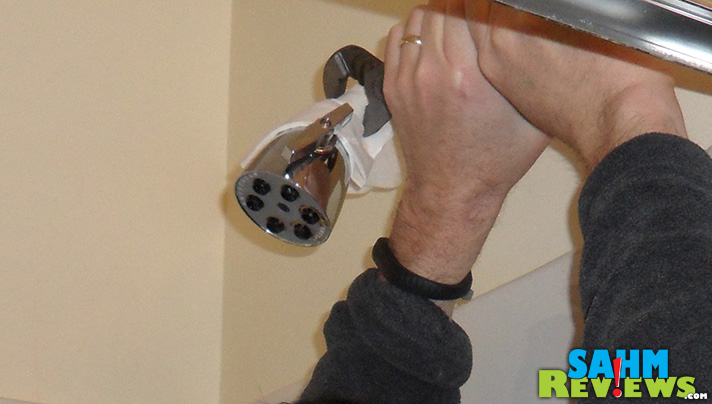
Remove the old shower head and clean it up.
Start with an adjustable or plumber’s wrench to loosen the fitting. Be sure to use a protective cloth to protect the finish in case you are saving the old head. Clean up the old plumber’s tape with some steel wool.
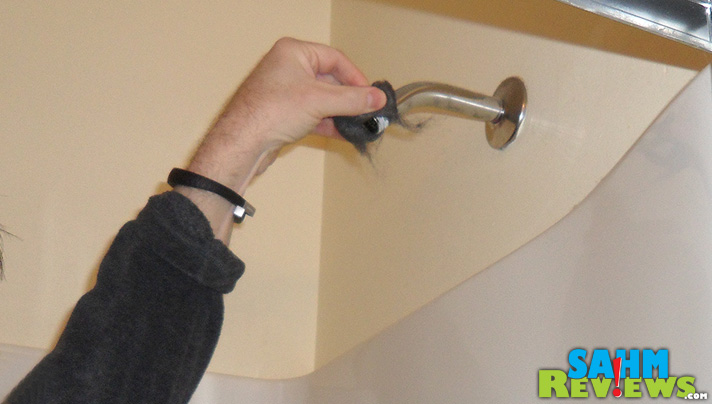
Prepare the pipe for the new head and install the “base”.
Once the pipe is clean, you’ll need to apply brand new plumber’s tape to the threads. Fortunately Niagara Conservation included a roll with just enough tape for the job. Typically you’ll want to wrap the tape around the pipe six or seven times to assure a leak-free fitting. Be sure to wrap clock-wise so the tape doesn’t come off or get bound up when you attach the shower head base.

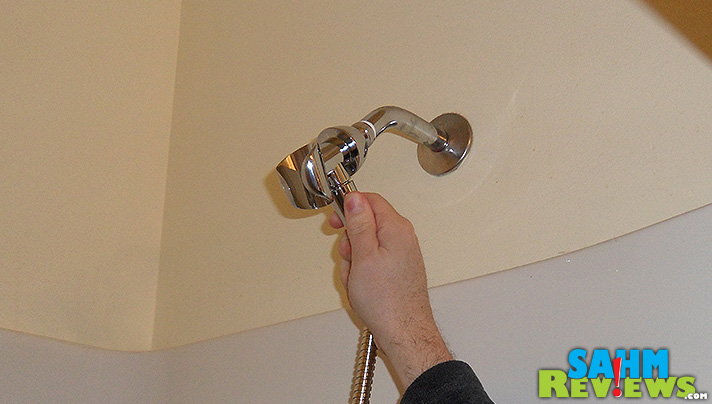
 Hand tighten the base and then grab your wrench. Again, you’ll want to use a cloth or rag to protect the finish of your new shower head. At this point you should only need to turn it a quarter-turn or so to snug it up.
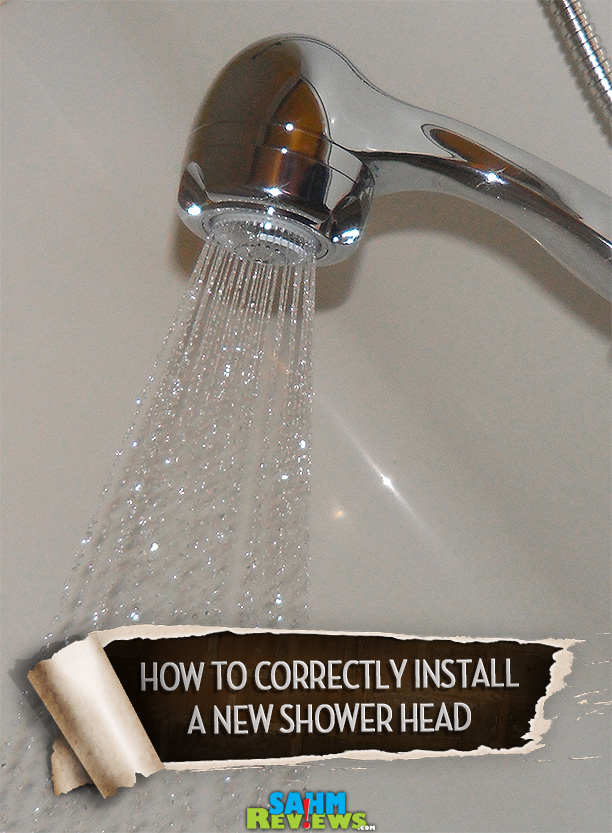
Finish by attaching the rest of the shower head parts.
You’re almost done, and here is the fun part. Attach the hose to the base you just installed. Hand-tighten is all you’ll need.
 All that is left is to test it out for leaks! If you do have water seeping through the connections, you’ll need to work backwards to repair it. 99 out of 100 times all you’ll need to do is add a bit more tape to the threads.
We decided to go with the Niagara Earth Massage Handheld for a couple of reasons. They boast a 1.5gpm usage so we should hopefully see a small savings in our water bill. This model only comes with two settings (regular and “power”), but the ease of which you can switch between them was our selling point. Too many times we struggle to change back-and-forth because the head won’t change easily (of course, my wife and I prefer opposite settings)…

 You can’t beat the price either for under $18! The only drawback or concern we have is the part that hold the head is chromed plastic, not metal (the fitting is metal, just the ‘hook’ that holds the head). With a little care this hopefully won’t become an issue.


Replacing the showerhead is one of my least favorite chores but it’s usually my fault. Every time we buy a new one, I think I remember how to do it and skip the directions. That’s when I end up soaked in water from leaks.
Excellent post! It really is quite simple when you get down to it….but I admit I still let my husband do it for me. LOL 🙂
Will be saving this for the future! I’d like to replace the whole tub and surround, so a new showerhead goes hand in hand!
Love this DIY tutorial! I am bookmarking this in case I ever need to do this!
This is my husbands job. He must do it correctly because we never have issues. We actually just bought a nice showerhead. Very good tips!
Wow that was simpler to do than I imagined
Thank you for the tips! It’s really something that it easy, but good to know how to do!
Yay for the SITS Girls for helping me find your blog! 😀
Thanks for a very good tutorial. The pictures helped a lot too. I really should clean our shower head…
Impressive! I really didn’t know I could do this on my own (face palm). Yep, I’m the one who calls the plumber then googles when it comes to anything with water ever since we had a huge leak that was inside a wall on the 2nd floor. But I think I could handle this!! Thanks so much for the tip!
xo ~kim & chloe @ popcosmo.com
Oh gosh. I’m a brand new homeowner and had never even *thought* of having to do practical things like cleaning/replacing shower heads! So much to learn! Thanks for making it look easy… one less reason to call the plumber. 😉
Wonderful tips and just in time as we’re planning to change our shower head this week. Thanks
#SITSBlogging
So that’s what that tape is for LOL! Unfortunately, I don’t think I realized that. Thanks for the great tutorial. 🙂
Replacing the shower head I leave to my husband. I am way too short to do it.
LOL totally just saved this for my husband, so when he fixes the shower heads again, he does it the CORRECT way. Not the leak all over the place way, haha.
Just the style I want for my shower. Thanks for the guide.
Bazinga
Where in this post was a ‘bazinga’ warranted, Sheldon?
Great tutorials and pictures. We could use a new one.
I have been wanting hubs to replace our shower head for EVER! I think with these detailed instructions of how to do it right, I might be able to manage it myself! Thank you so much for the awesome information! Great Giveaway too, btw 😉
I would love to win that. We need a new one! very cool!
I will most definitely use the tape from now on. Now I know!
Could def use a new shower head. Thanks for the helpful info.
I would Like This I Need A New Showerhead (Thanks )
Cool 🙂
Thanks for the chance!
PhyllisAdelle Sherer
South Carolina
thanks for the video. we need a new shower and shower head.
Thanks for the info! We actually just got a new showerhead and I was hesitant to start the installation myself.
You had me at saves you money on your water bill! My kids are starting to shower themselves now and I swear most of the time they are washing the walls rather than themselves. Showing this one to my husband for sure!
I am going to have my hubby read this since we have a bathroom remodel going on. Totally pinning to be used on a future date. Great advice.
This post was very helpful and it would have answered a few questions when I installed our shower head a few months ago. I had no idea what plumber’s tape was or why you needed it. That is until I got my entire bathroom soaked when I tried out my new shower head!
My husband replaced ours last month with a fancy, schmancy one. There was a lot of yelling going on in the bathroom that day, he could have used this for sure! 😉
This is so helpful! We just moved into a new home and all the shower heads need to be replaced but I had no idea where to start! I think after this post I’m ready to tackle it!
I love this post. My husband always replaces things like this. I had no idea wrapping the tape in a certain direction mattered!
I could use a new shower head in the kids bath. Theirs isn’t working well anymore.
My husband forgot to use the tape the last time he replaced a head. He fixed it, but he’ll never do that again!
It’s been awhile since I have had a new shower head installed and now that you mention it, the water pressure really isn’t as strong as it once was. I’ll have to buy a new shower head and replace it soon now that I know how to do it myself.
Poor replacement of your showerhead could lead to increase water bills. The complete guide on this website helped me to lower my water bills.